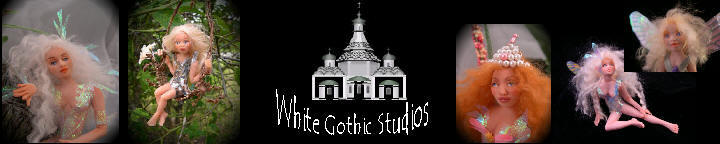
White Gothic Studios
FAQ
Question: What is translucent powder?
**** Question: I dropped my mold and it's broken. Is there a way I can fix it? Answer: Yes, you can easily fix it by making a mixture of powdered milk, glue and water. Here is a video on You Tube showing how easy it is. **** Question: My dolls don't come out of the mold looking like yours. Answer:
My dolls don't come out of the mold looking like my dolls either. I am the
doll designer and mold maker and I need to use the mold about 5 times before I
am satisfied with the look of the dolls as well. By the 6th, 7th and 8th doll, your own sculpting skills and creativity will emerge and the dolls will no longer look like mine. Your own path will be its own journey. By the 9th doll, you will be using the mold as merely "part formers" and you will be sculpting your own faces and changing the size and shape of the body parts as well. By the 10th
doll, you will be ready to try your hand at sculpting your own doll. *** Question: I notice people selling dolls on Ebay swear they don't use molds, but the faces are all the same. It seems obvious that they are using molds. What is behind this? Answer: When I created the first fairy doll push mold back in 1998 or 1999 and listed it on Ebay, it sold in about 2 minutes. There were bidding wars I never dreamed were even possible. I have sold my molds and training to thousands and thousands of doll artists, crafters, polymer clay artists and basic crafters since then. This whole craze, in my opinion, grew up around the push molds. It is the quickest and funnest way to learn dollmaking. When the dolls were selling on Ebay for quite a bit of money, artists began to list "no molds used" as a selling feature, as a way of competing against one another. Somehow, the "newbies" thought this was crucial to selling dolls, and now this unfortunate deceit has arisen in the polymer clay doll industry. I invite everyone to watch which dolls sell. They are always the prettiest, most unique, and/or best dolls. There are also doll artists who have put their time in at Ebay and generated their own following. They are selling to a waiting audience. *** Question: What is wrong with using molds? Answer:
Nothing. Porcelain doll artists have used molds for years. All of
the famous Figurine artists use molds. Making the best product you can, as
efficiently as possible, packing it with the most value, and doing it all for a
competitive price is the bedrock of all business ventures. Why anyone
would want to advertise they they work for hours and hours and don't expect to
get paid for it is bewildering to me. So if you are not comfortable with the lying that obviously goes on in this "no molds used" controversy, focus the purchasers attention on your doll itself. You are under no obligation to explain your whole process of working. Most artists in other mediums never reveal their techniques. Just practice and make beautiful work, be willing to stick around Ebay and other auction houses long enough to build a following. *** Question: I am overwhelmed. I want to learn polymer clay dollmaking, but which mold should I start with? Answer: I recommend the following pathway and you will build your skills and learn the techniques to build one upon the other. 1st - Baby
Fairy Beginners Kit is the easiest one to make. The Baby Fairy DVD is 90
minutes long and it assumes you know nothing. It begins with the box of
clay. 3rd - 8 Inch
Lady Doll *** Question: Do I need the Doll Eye Mold? Answer: No, you do not. The larger Doll Eye Mold is really designed for Porcelain doll artists and also for polymer clay doll artists who sculpting larger dolls with no molds. The small doll eye mold can be used with the doll molds but it is not necessary. The push molds form their own eyes. The small doll eye mold is the one you would want to order if you want to make insertable hand-painted doll eyes.
Question: What is polymer clay? Answer: Polymer clay is a polymer clay-like material that is malliable while using the clay but bakes to a hard plastic like substance in your home oven. Question: How do the molds work? Answer: The push molds, or press molds, as some people like to call them, are filled with clay on both sides, the molds are closed and very gently pressed together and when you open the mold, the pieces stick together like puzzle pieces. The body parts come out with the facial features, including the eyes, molded and fingers and toes molded as well. Once the doll artist or crafter becomes familiar with the dollmaking process, the dolls take on an individual look to them. Just as every person has an individual handwriting, the push mold dolls only look similar until the person develops a certain proficiency in making them. You can see a video of how the molds work and how to blend the clay here. Question: Can a beginner learn this type of dollmaking? Answer: Yes, they can. The molds as well as the instructions are designed for use by beginner polymer clay enthusiasts and beginner dollmakers. I have taught thousands of dollmakers this type of dollmaking and many of them have moved into one of a kind dollmaking. They have learned sculpting by using the push molds and they all reach a point where they no longer need them. Many artists still use my molds as "part formers" so they can reduce the time it takes them to make an original one of a kind creation. Question: Your designs are copyrighted. What does that mean? Answer: The copyright protects someone from copying the molds, the designs, making molds of my dolls and then claiming them as their own. The molds are designed for people to use and they do sell their dolls and there is no infringement in selling dolls individually or at craft and art shows or on the internet. As long as the user does not claim the design as their own, it’s not a problem, especially if the molds are being used as part formers. Question: Which mold should a beginner start with? Answer: The easiest one is the Baby Fairy. The Baby Fairy Mold can be purchased alone and comes with an instructional pattern; or you can purchase the Baby Fairy Mold with the DVD and it shows the whole process. The DVD was dedicated to brand new beginners and is geared for that level. It begins with cleaning the mold, blending and leeching the clay to make the clay more manageable for beginners, and shows each step up close so the beginner can see the entire process. The Baby Fairy also comes in a Baby Fairy Beginners Package where you get the mold, enough clay to make about 10 Baby Fairies, the dvd, your sculpting tools, doll hair, and a sheet of butterfly wings that can be scanned and saved to print out on labels over and over again. Recently I did shoot a 2 hour Fairy DVD that is also geared for beginners. Often times the beginners want to do the Lady Fairy or Fairy Maiden and wanted a DVD that showed the lady dolls, so I have done one. You can now start with the Lady Fairy or the Fairy Maiden, any of them really. The DVD uses several dolls and you can use the DVD with any of the molds. QUESTION: Suppose I am a beginner and want to start with a larger fairy, which would would you recommend? ANSWER: I would recommend the Fairy Maiden. She is molded in one piece and her arms are bent so you will not have to worry about elbows. She has a small breast, is rather slim and comes with the online course that teaches the whole system. Her eyes are already molded so you can add your own glass eyes, if you want to, or you can paint the ones the mold makes. I would also recommend the Lady Fairy mold. She is a rather thin fairy, she has small breasts, and this mold comes with two small face molds that fit onto the Lady Fairy Push Mold. QUESTION: How are the smaller dolls different from each other? ANSWER: All of the dolls are slightly different from each other and sometimes their patterns teach something different. Below is a chart showing how each doll is different.
|
|||
Mold Name |
Mold Features |
What it comes with |
|
Baby Fairy |
Baby is 3 inches tall laying down. Sitting, she is about 2 inches. |
Mold comes with the two additional faces that fit the baby fairy body. It comes with the printable online course.
|
|
Baby Fairy & DVD |
Same as above |
Mold and DVD that explains the entire process. |
|
Baby Fairy Beginner Kit and Deluxe Beginner Kits
|
Same as above |
Mold, sculpting
tools, clay and hair (for 10 babies) 5 Fairy Wings (that can be copied
over and over) |
|
Lady Fairy |
Mold makes the entire fairy. The body is very, thin. The body has small breasts and the face molds fit onto the lady fairy mold |
This mold comes with two additional face molds that fit onto the original push mold and the online course. |
|
8 Inch Lady Doll - Boudoir |
Doll is molded in pieces. Head/torso, arms and legs. |
It comes with the general online course, and another course that teaches how to make the stockings, how to sculpt panties, form nipples, and how to attach the body parts and pose the doll in one process. |
|
8 Inch Mermaid |
Doll is molded in 3 pieces. The head/torso/tail, the arms and fin are separate. |
Comes with the printable online course |
|
7 Inch. Fairy Maiden |
Doll molded all in one piece with arms bent for beginners - has breasts, comes with extra faces |
Comes with the online courses. |
|
7 Inch Fairy Gwen |
Doll is molded all in one piece, arms straight. Womanly body. Comes with 4 Cabo Faces sized for a 7 inch doll |
Comes with online course and the course on how to use the cabo face mold. |
|
Fairy Temptress
|
Doll is molded in one piece, more womanly body, and her eyes are designed to paint first and then add the lids or to use glass eyes instead. |
This doll has no eye lids. The DVD shows how to paint the eyes with the eyelids and without the eyelids (eyelids are added after the eyes are painted.) This mold is for those that prefer to do their painting first and the add the eye lids. |
|
Dollhouse Mom/Dollhouse Doll |
Molds the doll in one piece, 5.5 inches tall. Comes with two face molds that fit the master mold. |
She comes with the online course |
|
Dollhouse Lance/Man |
Mold is in one piece, 6 inch male mold, comes with one extra face mold that fits the master mold | Comes with the online course | |
| Dollhouse Teen Mold | Doll makes a teenager, about 4.5 inches tall, tiny breasts, and comes with two additional faces | Comes with the online course | |
| Dollhouse Tiny Baby | Tiny baby, closed eyes, is made in parts. | Comes with the online course | |
Lg. Doll Eye Push Mold |
Mold makes doll eyes from 8mm to 26 mm (This mold is for larger dolls and porcelain dollmakers) |
This mold comes with an online course on how to make the eyes using the doll eye mold, how to insert them, paint them, etc. You can also purchase it as part of a kit with a DVD that shows how to use the mold, how to insert the eyes, paint them, etc. |
|
Small Doll Eye Mold |
Mold makes eyes from 2 mm to 8 mm and "Bratz-styled eyes) (This is the mold that makes the tiniest eyes that can fit the push molds or be used by one of a kind doll artists to get even-sized eyes) |
This mold comes with an online course on how to make the eyes using the eye mold, how to insert them, paint them, etc. |
|
9 Inch man Mold |
Mold makes the man in 7 pieces. The legs, upper arms, lower arms, head/torso. The mold makes shoes. |
This mold comes with the online course as well as another course that shows how to make the Basketball player, the uniform, the basketball and the sneakers. |
|
Fairy Urchin - 4 inches |
Forms the doll all in one piece. |
Comes with the online tutorial |
|
Fairy Waif - 4 inches |
Forms the doll in 3 pieces; head/torso/legs and two arms. This body is very thin. |
Comes with two faces and the online tutorial |
|
Fairy Toddler |
Forms the doll in 3 pieces; head/torso/legs and two arms. Think body, smaller than the waif, head is rounder and can be tweaked into an infant in a blanket. |
Comes with the online tutorial. |
|
QUESTION: What kind of clay do you use?
ANSWER: I use a blend of Super Sculpey and Sculpey III in the color white. In the Baby Fairy DVD, I show the formula and how to blend it using a pasta machine. But you can use your hands to blend it too. I use 1/4 box of Super Sculpey to 1/8 block of the Sculpey III.
QUESTION: It's hard to picture any of this
ANSWER: I have a few free tutorials on my tutorial page. A few of them link to You Tube and you can get a feel for how easy it is by having a quick look there.
QUESTION: Are you aware that another doll artist copies everything you do?
ANSWER: Yes, I am. I cannot legally use her name, but we all know who she is. With all of her talent, maybe someday she will create something of her own. I used to think she was a great doll artist, but now know she is merely a "knock-off" artist and has been knocking off other artists all along.
I should take bets as to when she will now release her "pourable" ceramic/porcelain molds.
QUESTION: If I have another question that does not appear here, an I email you for my additional questions?
ANSWER: I would be happy to answer any questions you have before your purchase or after purchase. Please feel free to email me for help.